Showing posts with label red. Show all posts
Showing posts with label red. Show all posts
Saturday, 21 January 2012
Journalling - a new adventure
It's been a while since I blogged, but I have still been creative even though I've been quiet!
I'm generally more of a fabric fan, but just recently I had a yearning to doodle. I've fallen in love with pinterest recently and have been collecting pictures of art journals. I decided to start keeping one myself. I searched high and low in the local shops for a suitable book to use, but couldn't find anything! After waiting impatiently for a couple of weeks to see if any came in, I had the brainwave of making my own journal. I've always thought of this as a really hard, technical thing to do, but in fact it's really not that difficult.
So here is a sort-of tutorial (it's only a "sort-of" because I didn't take pictures of every stage, it just occurred to me afterwards that it might be good to share the process!).
OK so bear with me as I don't have pics of this bit. First thing I did was get hold of five A2 sized sheets of watercolour paper. Now I know not everyone has these lying around. I happen to have a very generous art-teacher friend who was clearing out her cupboards. Using a long ruler as a guide, I tore each sheet in half and half again, so I had four A4 sized sheets from each large one. I could have cut them, naturally, but I quite like the look of torn edges, plus I wanted a bit of a rough-and-ready look to my journal.
Once each sheet was torn into four, I folded the four sheets in half, so I ended up with five stacks of folded paper. Then, using a bradle (is that how you spell it? little metal spike with nice handle!) I poked three holes through the centre of each set of pages at regular intervals (having measured them first).
Picture coming soon, I promise! I then stitched the pages together. I kind of used this very helpful tutorial to work out how to stitch the pages together, but having only made three holes rather than four I realised I had made life a little difficult for myself! Still, I managed to attach all the pages to each other. You would think it is very fiddly, but honestly it's not. This pic show the sewn pages of my journal (I used waxed linen thread to sew it together, and it's black because that's all I had!)
See? It's not mega pretty along the edge but it won't show in the finished article, and it's fairly unobtrusive inside.
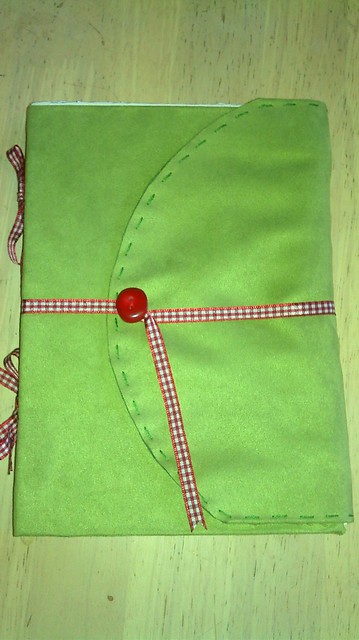
OK, next I made my cover. I used a lovely green moleskin-effect fabric that I had bought years ago, waiting for the right project to "speak" to me, and it shouted that it wanted to be a journal cover! I don't know how well it will stand up to wear and tear, and I suspect it will look fairly grubby by the time the journal is full, but I think that will all add to the authenticity.
So I started by cutting two pieces of stiff card the same size as my folded pages (so about A5). I measured the height of my sewn pages and made that the distance between my pieces of card. I glued the card down with some wood glue (just what I had to hand; copydex or fabric glue would do just as well). I then weighted down the card until it had dried as the glue had made it warp a little.
I then cut out my fabric, leaving about 2cm extra round the sides, and about 10cm at the right hand side. This was to make a flap to go round the journal, to keep it protected when not in use. I also cut two parallel slots in the "spine" of the fabric (you can see those in the photo above) at two points, for me to thread the ribbon through later. I then glued the extra fabric down onto the stiff card, trimming it at the corners and the spine so it folded down nicely.
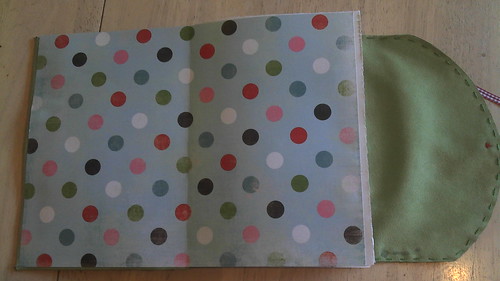
Having made a flap for the front, I decided it would work better if the flap was rounded. So I used a dinner plate to draw a curve onto the fabric, and onto a second piece of fabric which I then attached with a simple running stitch to the over. Here it is:
The added bonus is that the flap makes a little pocket which is perfect for keeping wee pictures and inspirations in for later!
Now I added the ribbons which attach the book pages to the cover. I've not seen this done before so I made this bit up as I went along. Here's a close-up of the ribbon attached:
Basically I threaded the ribbon onto a tapestry needle and, starting from the outside, threaded it through the uppermost slot, then down through the threads on the pages, then out through the lower slot. I tied the ribbon in a bow and cut it to the correct length, then repeated for the other end. I won't lie: this bit IS fiddly. If you have a curved needle then it will make it much easier. But don't let that put you off; it's only a very small part of the process. Here's how it looked after both ribbons are attached:
I rather like it!
Next step was to finish off the cover. I took another length of the red gingham ribbon and sewed it, together with a lovely cherry-coloured button, onto the centre of the curved flap. The ribbon wraps around the book, then twists round the button to hold it firmly in place. In all I bought two metres of ribbon and that was plenty for the whole project. I am SO glad I went for red, it really pops against the green fabric!
Final step was to add some endpapers. These cover up the bits where the fabric is glued inside and hide the spine. They also help to strengthen the bond between the pages and the cover. I used a couple of sheets of scrapbooking paper, cut them to A4 size then folded them in half, then glued them in place, making sure the pages were squared up to the stiff card of the cover:
I then placed the whole thing under a pile of books until the glue had dried.
So there you go - I hope you like my journal! It was my first attempt at making a journal and I can see all the bits that didn't quite work the way they should have ... but I'm happy with the basic principles (which is why I'm brave enough to share them!)
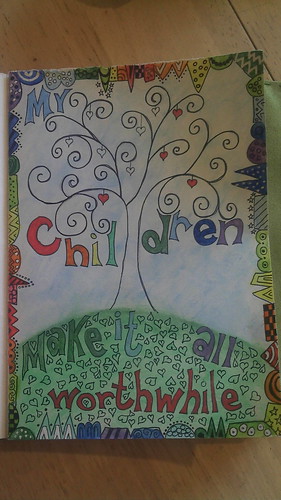
Lastly of course I created my first journal page ... this is it almost completed. Since I took this picture I've added some more colour to the "leaves" and the trunk.
Thank you for reading; I hope this inspires you to have a go at making your own journal!
Saturday, 26 February 2011
My favourite sweater
This is a commission that I completed towards the end of last year, and it remains my favourite. My brief was to create a sweater like this one:
See the black and red sweater? Or did you blink? Watch it again ... that's it!
So, armed with King Cole Haze in Poppy and Ebony, and a suitable sweater pattern for adapting, I set off:
We decided to make the stripes all the same width for ease, a long length body and slightly overlong sleeves. Here it is in progress:
And here's the final result in action (on a booga board, I think!). Twas just what she wanted, hooray!
Labels:
ashes to ashes,
black,
commission,
knitting,
red,
sweater
Monday, 11 January 2010
Projects on a theme of ... stripes!
I seem to have made a lot of stripey things lately! Stripey sock monkeys (this is Max and Jake). I love making sock monkeys, I think I have made over fifty now! I love the way they all have different faces and looks, and I love giving them names (though I usually let my daughter Caitlin choose them!).
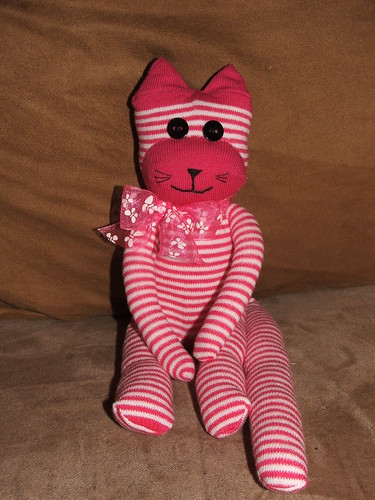 A foray into sock cats for a change. Not sure how successful that was. It's rather cute, but I'm too in love with my monkeys I think ;)
 ... and I was commissioned to knit a Dennis the Menace sweater as a Christmas present! Shame I only managed an awful blurry photo of it, taken on a rather dark afternoon. It went down extremely well with the little boy who received it, and was rather fun to knit as well!
 Stripey sock monkeys (this is Max and Jake). I love making sock monkeys, I think I have made over fifty now! I love the way they all have different faces and looks, and I love giving them names (though I usually let my daughter Caitlin choose them!).
 A foray into sock cats for a change. Not sure how successful that was. It's rather cute, but I'm too in love with my monkeys I think ;)
 ... and I was commissioned to knit a Dennis the Menace sweater as a Christmas present! Shame I only managed an awful blurry photo of it, taken on a rather dark afternoon. It went down extremely well with the little boy who received it, and was rather fun to knit as well!
Thursday, 10 September 2009
Branching out
I would be the first to admit that there are few things I haven't tried in the field of crafting - however, there are two things I have never got into: jewellery, and card making.
Well that is changing! I can't imagine ever getting the "bug" with regard to these two crafty activities but I'm having a go! Here's my first attempt at a bracelet(apologies for the off-centre photos, not sure what's going on there, they look fine in preview!):
 Two rows of buttons, round ones underneath, and mercerised embroidery thread to hold it together. Which looked nice when I first did it but is now looking a little raggy and is quite hard to do up!
Full of enthusiasm, I decided to have another go:
 This time I used jewellery wire and a clasp. Spot the beginners errors! I don't particularly like the clasp but it's all I could find. And I have now learnt that the colour of the wire does matter - erk at putting silver and copper together! However I love the colours and I am pleased with the little seed beads which add a nice touch . (and once it's on no-one except me notices the colour clashes!
Well that is changing! I can't imagine ever getting the "bug" with regard to these two crafty activities but I'm having a go! Here's my first attempt at a bracelet(apologies for the off-centre photos, not sure what's going on there, they look fine in preview!):
 Two rows of buttons, round ones underneath, and mercerised embroidery thread to hold it together. Which looked nice when I first did it but is now looking a little raggy and is quite hard to do up!
Full of enthusiasm, I decided to have another go:
 This time I used jewellery wire and a clasp. Spot the beginners errors! I don't particularly like the clasp but it's all I could find. And I have now learnt that the colour of the wire does matter - erk at putting silver and copper together! However I love the colours and I am pleased with the little seed beads which add a nice touch . (and once it's on no-one except me notices the colour clashes!
Wednesday, 12 August 2009
A little bit of kitsch
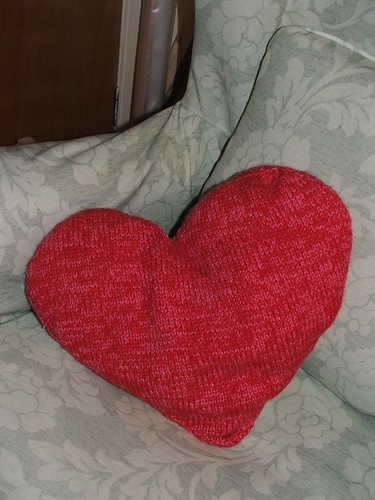 I love bright colours, but generally tend to steer away from anything too kitsch (WHAT??? I hear you say?) - no really, I do! However I couldn't resist making this heart-shaped cushion.
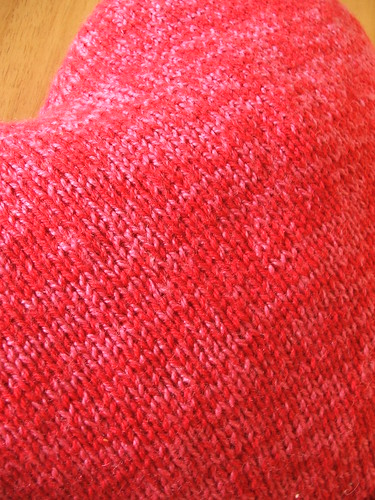
To soften the effect, I used a red and a bright pink knitted together, so that it gave a mottled effect. I quite like the way it has come out. Perfect for a rather dark corner in the hall.
Subscribe to:
Posts (Atom)
