Pages

Friday 27 April 2012

More Adventures - this time in yarn dyeing

Wow, what a long time since I last posted! Apologies, life has been a little hectic around here. Crafting still going on (at a slightly reduced rate!) but back to normal after next week.

In the meantime, I finally got round to dyeing my lovely hanks of yarn I got from World of Wool . I got a gift voucher from there for my fortieth birthday last year, and promptly invested in  two hanks of yarn and six wee pots of dye. However I was then too scared to use them! So this week I got together with a friend and she showed me what to do.

Firstly, we dunked the yarn (and some carded fibre to experiment with first) into a bucket filled with malt vinegar. I didn't realise you could use normal brown vinegar, I thought it had to be distilled! So that was my first surprise.


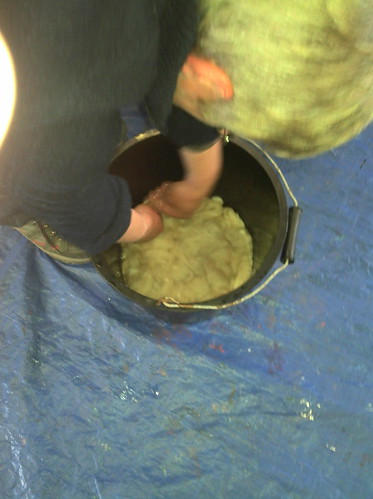
This is Bettine giving my wool and her fibre a good pummelling in the bucket. You can imagine the smell for yourself! It's not really a very social activity!

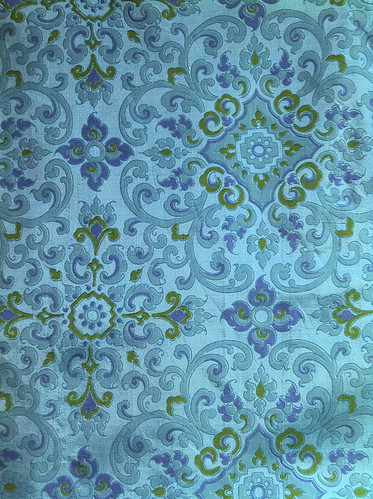
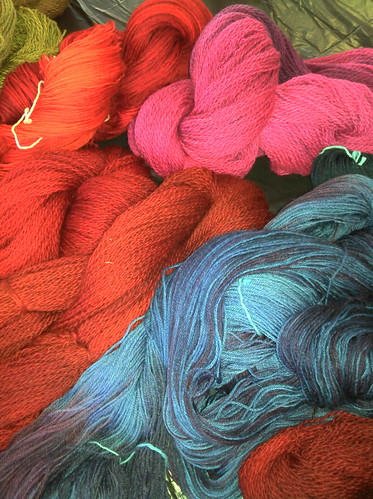
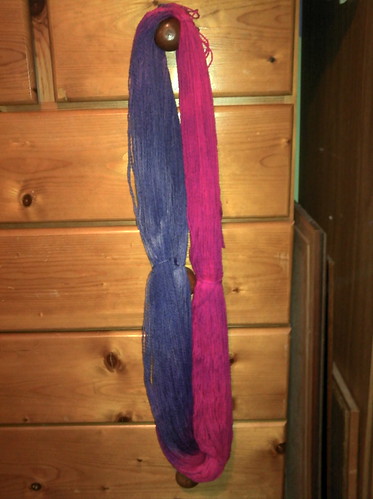
She showed me some of the yarn she had dyed herself the previous week - aren't the colours wonderful?

Unfortunately I forgot to turn the flash off so some of the colours are reflected in the lustre of the yarn but you can see what wonderful vibrant colours she got! There's a mix of painted and pan-dyed yarns there.

OK - on to our experiments. This one didn't go as expected (actually to be fair, none of them did! But that's half the fun of it!). I used cherry red, crimson and orange, but it all ended up fairly much one colour.


You can see some undyed fleece in the background there. This is the fleece all dyed and ready to go into the microwave (I put it inside a microwaveable bag first to make sure we didn't coat the inside with dye!).

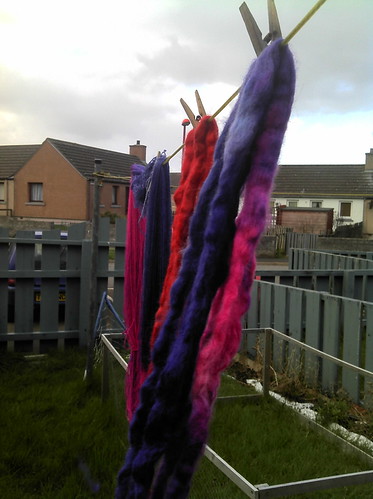
The next thing we did was take the first skein of yarn and pot-dye it in two colours, fuschia and periwinkle. Unfortunately I don't have any photos of the dyeing process because my hands were covered at that point! But here is the end result, with the red fleece and another piece of fleece dyed in fuschia and periwinkle, all drying on my washing line (scuse the poor photo, the light was just beginning to fade at this point)


And here's the skein all dried and ready to wind!

A lot more pink than I intended, but I was really pleased with the variation in the colour in the blue.

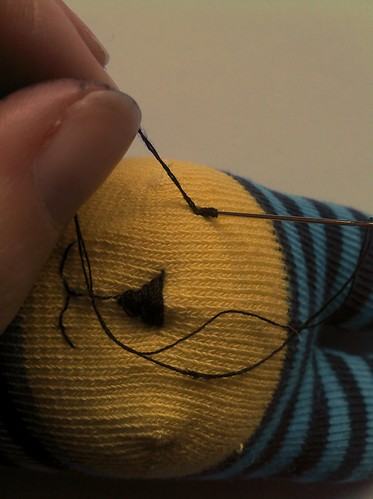
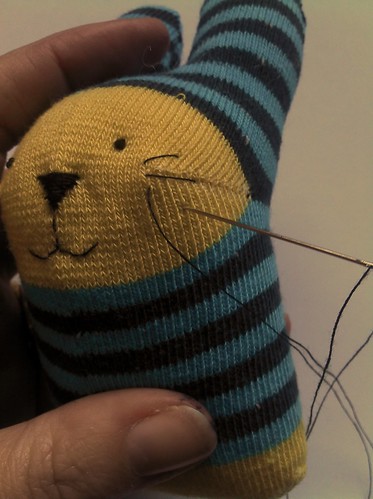
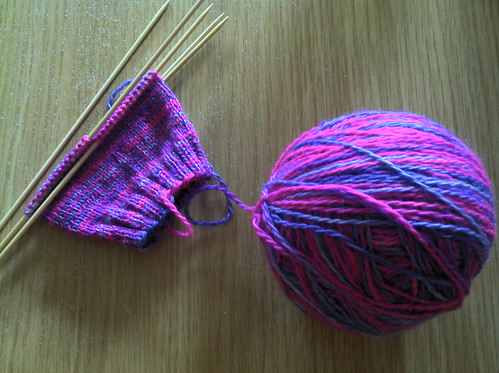
Naturally I wound it up and started knitting a pair of socks straightaway!


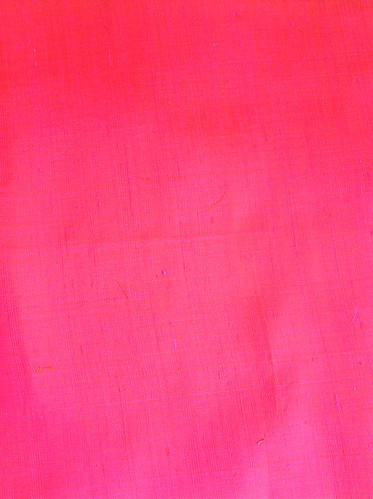
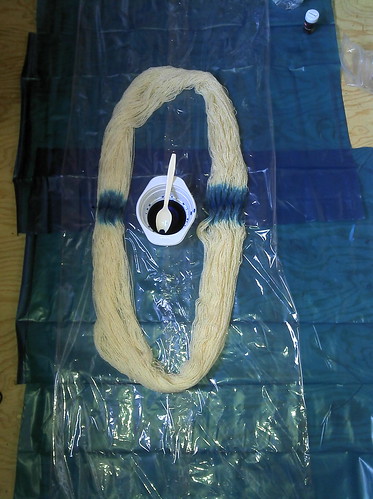
That was yesterday. Today, embolded by my success, I decided to paint my other skein (I had kept it in a bag so it was still damp with vinegar). So I laid out my yarn on bin bags and clingfilm, and started with some turquoise just dripped onto two points of the yarn:


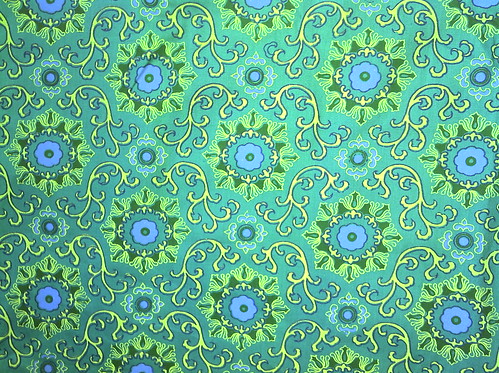
I then took some bright yellow and dribbled that over the yarn. Then I added a wee bit of turquoise to make a lovely green, and splatted that in the spaces. I'm about half way through doing that here.


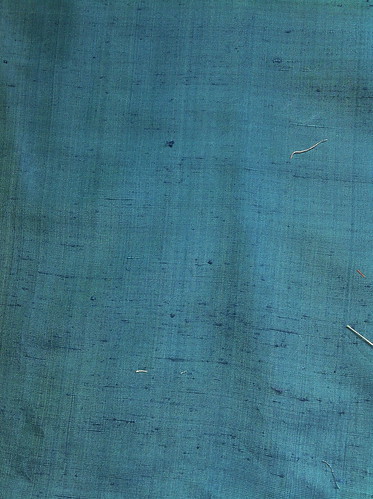
Now what I didn't anticipate was how much the colours would mix together during the setting process! Here's the yarn just after it came out of the microwave (I did it for three minutes in a 700w microwave, then did it for another minute just to make sure).


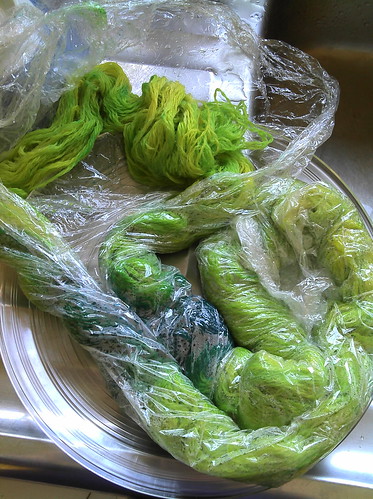
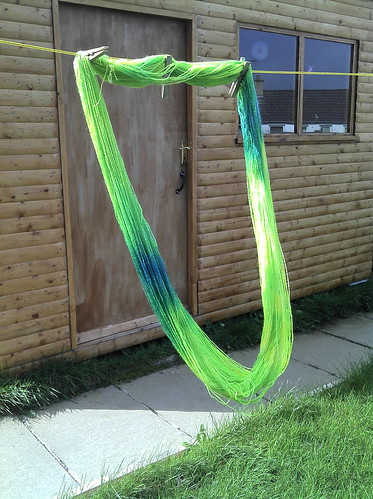
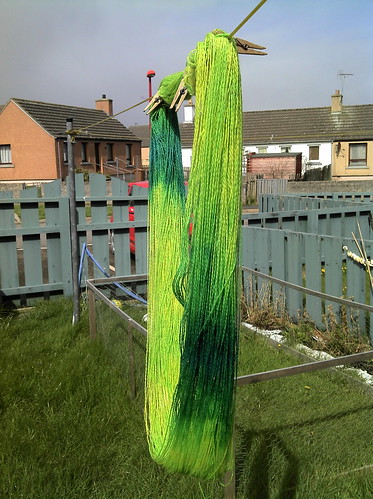
I think maybe I hadn't done it for long enough, but I was scared of burning the yarn. I took it out and rinsed it ... and all the colours began to blend! Never mind, I'm very happy with the finished result.

The turquoise is now more of an emerald green - I was aiming to have "dots" of colour when it is knitted up but I think they will in fact be wee lines of bright green - we shall see!


One thing I will say though ... I am hooked!! I can't wait to try this again!!

Tuesday 17 April 2012

More vintage deliciousness

At Christmas, whilst staying with my parents, my mum pulled out a huge box of fabric she had been given by my aunty when she had moved house recently. Much of the fabric had lain undisturbed in a box for the best part of forty years. Some of it was beautiful Thai silk which my dad had purchased when visiting there before he was married.
The pink colour is absolutely fabulous, it is a combination of pink and orange and shimmers in the light!

This photo doesn't do the blue justice; it has a purple shimmer running through it.


We then unpacked lots of wonderful cottons ...

And oohed and ahhed over the fabulous patterns ...

And the oh-so sixties colour combinations!


This one is particularly fantabulous, I think:


Sadly they are mostly bits left over from dressmaking, so most pieces are barely a fat-quarters-worth.


So I shall have to be very sparing in my use of them!


Which is your favourite? Do let me know!


Friday 13 April 2012

My first award!


Thank you to Nina at Youloveityoudo, for nominating me for my first award! It is the Versatile Bloggers Award and I am really chuffed to get it. Nina is quite new to blogging but has some lovely stuff (I am particularly in love with her VW campervan cushion!)

So the rules of the VBA are that I must nominate 15 other bloggers to receive this award. In no particular order (and with apologies if you have already been nominated elsewhere!), here are my nominees:


PennyDog
Hapi-Ness
veryberryhandmade
Driftwood
Julia Crossland
Sal's Snippets
Hand Knitted Things
Sew Recycled
Bobo Bun
Fan my Flame
Marmalade Rose
Tizzy Crafts
Easy makes me happy!
Teeny weeny design
Maximum Rabbit Designs

Some of these blogs I have visited many times, but some are new to me ... all are full of inspiring posts and insights into some crafty minds!

The next thing I have to do is tell you seven things about me:

I live in the most northerly town on the British mainland. I can see the Orkneys from here!
As a child and a teenager I was an actress, appearing in several children's TV programmes, soap operas and even a pop video!
I was taught to knit by my next-door neighbour's granny. She was very patient when it came to sorting out dropped stitches and too-tight tension.
I have had many different jobs, including manager at Harrods in London and auxiliary coastguard.
I have rather eclectic tastes in music and am a big fan of Kate Bush and Bat for Lashes. And Debussy.
I have a degree in Behavioural Sciences. Not terribly relevant to crafting!
I have lived in 14 different places, including an island with a population of 32.

Thank you for reading, I'm now off to add my VBA button to my blog and pass on the good news to all my nominees. Have a great weekend.

Monday 9 April 2012

Some vintage style crochet and the giveaway winner!

I love crochet. Love love love it. And I really like granny squares too. So when I came across this crochet-a-long on this lovely blog apple blossom dreams I just had to join in, even though I'm a bit late to the party! Since this morning I have crocheted 13 roses (there are meant to be 12 but I lost count! But I'm thinking I might make it 16 anyway).
Apologies for the poor photos, I took them in electric light. But don't they look pretty altogether?
I've added leaves to some and cheekily crocheted the white border even though we haven't had that part of the tutorial yet (bad me).
I'm pleased with the colourway too, I think it works really well. I will show you the finished cushion cover when it's all done! It's not too late to join in with the CAL either - just follow my link or click the button on the right and get crocheting!

And lastly, here's the winner of my wee bunny rabbit that was featured in my sock rabbit tutorial last week. Thank you all for your comments, on here and on my facebook page. We put all the names into a hat and drew out ... (drum roll) ... Driftwood!!! Please let me have your address and I'll put him in the post to you :o)

Now I'm off to have a look at Handmade Monday to see what else crafty folk have been up to ... hope you had a lovely day today.


Friday 6 April 2012

Branching out

I'm always keen to try my hand at new things. I am most confident when it comes to working with textiles, but somtimes I get an overwhelming urge to have a go at something different. The thing I find surprising is that I often find I don't enjoy something I thought I'd love, or I develop a new passion in an area that previously held little appeal. Has that ever happened to you?

Anyway, I thought I'd share a few projects I made in the last couple of years that I've not put on this blog before. I have a passion for recycling, and there's nothing I like more than to make something great out of things that is usually viewed as rubbish. I'm very lucky to live by the sea, and often enjoy beachcombing on a good day. As a result I have lots of boxes full of little pieces of sea-washed glass and pottery. Sea glass is beautiful - the combination of sand and rolling waves softens the edges of the broken glass and mottles the surface. Most of the pieces I find are white or various shades of green, but occasionally I find the odd little bit of blue and brown (and once a beautiful pale pink piece!). I have made a few coasters using the sea glass which I use in my studio when I'm in need of a cuppa:


Also pictured is a trivet I made from recycled t-shirt material (see my tutorial on how to make a rug - it's just a smaller version of that!). The coasters are easy to do - I bought some cheap coasters, painted them white with some acrylic paint, added the glass with a little wood glue, then grouted the whole thing once the glue was dry. A couple of coats of varnish over the top ensured it was waterproof. Just make sure the pieces of glass you use are as flat as possible - sea glass usually comes from broken bottles so are often curved in shape - the smaller the pieces you use, the flatter they tend to be.

However I wanted to make something to showcase the bigger (and less flat!) pieces of glass I had collected, so I made this mirror for our bathroom:


I just love this mirror - the big piece of glass in the bottom centre fish, the different colours, the swirls - it was worthwhile. But I surprised myself by not enjoying the process of making the mosaic as much as I thought I would - I got stressed about how and where to put all the individual pieces, and worried about whether I had made the right decisions! However it hasn't put me off making them as I just love the end result. I went on to cover a large planter in bits of pottery I found on the beach too (here it is in a local gallery):


When making this one I relaxed a lot more and just shoved things on fairly randomly. You can tell! But I like the end result and so far it has survived the winter in my garden quite nicely. I attached the pieces with cement this time and used a grout suitable for outdoors.

I hope you like my forays into things other than textiles and that it encourages you to have a go at something you may not normally consider trying.


Tuesday 3 April 2012

Baby sock rabbit tutorial ... and giveaway!

Easter is almost upon us, and if like me you would always rather give a handmade gift than yet more chocolate, then I have a little tutorial for you to run up a very sweet present for a child near you! All you need is a baby sock, sewing thread and stuffing, and a spare half hour. In no time at all you will have a unique gift to bring a smile to someone's face!


So - first find yourself a baby sock. Let's face it, if you have small children, you probably have a bunch of these, all missing their mate. I have a theory that all lost socks find their way to heaven, and on your arrival there you get presented with a box full of them. But that's just my warped imagination.


Turn your sock inside out. Using a biro or a felt tip, draw an outline of the ears at the top of the sock (the cuff end). Your ears should cover between a half and two-thirds of the top part of the sock. If you are using a white sock you might want to use a paler colour just in case it shows through, but it shouldn't matter too much.  Leave a wee gap between the ears so that you can cut down it later.


Next, take some sewing thread and sew along the lines you just drew. I've used yellow thread so that you can see it easier, but it's better if you match it to the colour of your sock. Use a backstitch and make your stitches small and neat. If you prefer you could use a sewing machine to do this bit; handy if you decide to make a few of them at the same time.


Cut round your ears, leaving a small border round the edges. Make sure you cut almost up to, but not in to, the stitching across the bottom of the ears.


Next, cut a hole in the toe of the sock. It should be big enough for you to put the stuffing through.


Now turn your bunny the right way out and stuff it! Make sure the stuffing is evenly distributed across the ears, and resist the temptation to overstuff it. The softer and squishier they are, the more huggable they are. So my kids tell me anyway.


Sew up the bottom of your rabbit using matching thread. As you can see from my photo, I gently turned the raw edges in as I sewed for a neater finish.


Now it's time to work on the face! I just wing this bit freehand, but if you are a bit nervous about that, you could draw on the features with washable marker pen first. You could use embroidery thread or ordinary sewing thread for this bit (I used sewing thread because it's a bit finer and I like delicate features, but it can be a bit fiddly when it comes to filling in the nose). Start by sewing an upside down triangle for the nose, making the top of the triangle level with the seams on the heel of the sock. Then sew the mouth with the stitches curving upwards at the ends (otherwise you will have a sad bunny).


Next fill in the nose. As you can see from my photo, I used my thread doubled at this point to make it a bit less fiddly, but you could use embroidery thread instead if you prefer.


Now add some french knots for eyes. If you aren't giving it to a small child, you could use seed beads or little buttons for the eyes instead (see the end of the post for some rabbits with seed bead eyes).


Finally give your rabbit some whiskers. Bring your thread out at the start of the heel seam, and sew a long stitch along it. Add two more stitches either side of this one at an angle. Repeat for the other side.


And there you have it! Your own little baby sock rabbit.


You could make them in lots of different colours:


You could even make a family of them! (I made these last year - check out the seed bead eyes). For the mummy rabbit I used one of those socks with a frill round the top.


So - go and have fun making your own wee rabbits! As always, feel free to make as many little rabbits as you like for your own use or for gifts, but please do not make them to sell. If you do make them and post your results, please link back to my tutorial - and come and let me know so I can see what you made! I've also set up a flickr group for you to add your bunny pictures to, so we can share them all!

And finally - I did say there was a giveaway, didn't I! If you would like the little rabbit I made for the tutorial, please leave a comment on my post; if you link to my tute and giveaway on your own blog then come and post that too, it'll give you an extra entry into the giveaway! I will choose a winner at random next Monday and post the results on here.

Thank you for reading - I can't wait to see the rabbits you make!