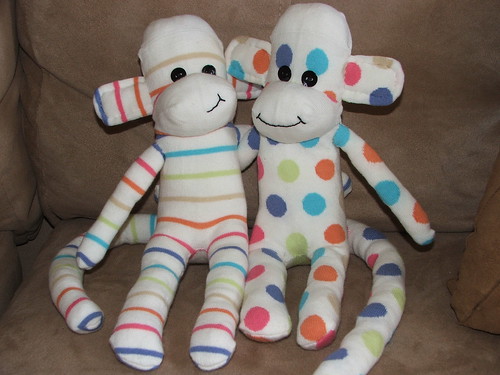
 Then before you know it ...
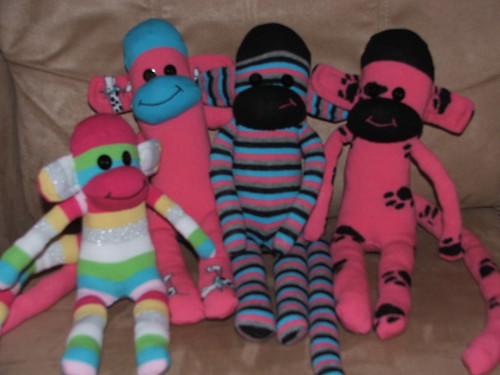 They start breeding ...
Rather cute though, aren't they?
Then before you know it ...They start breeding ...
 However, I put all my frustrations aside to make this big snuggly blanket from my leftover scraps. It's very easy to do and I can almost do it without looking (I just sneak occasional glances out of the corner of my eye as I'm watching TV) and (best of all in my opinion!) it keeps my lap warm on cool evenings!
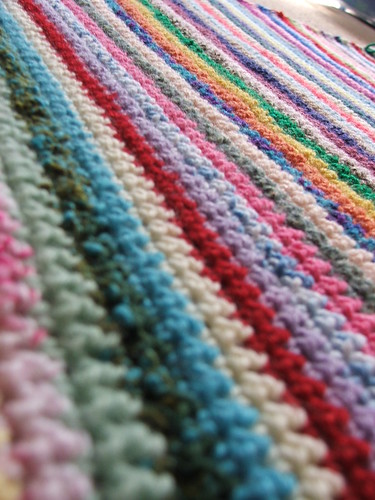
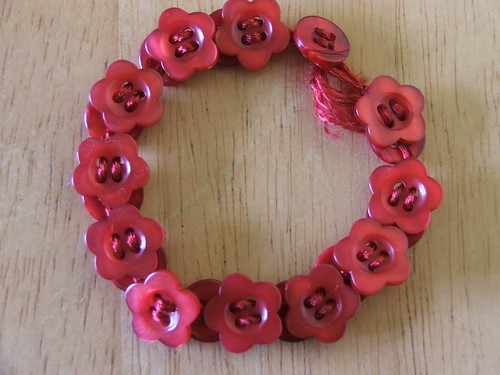 Two rows of buttons, round ones underneath, and mercerised embroidery thread to hold it together. Which looked nice when I first did it but is now looking a little raggy and is quite hard to do up!
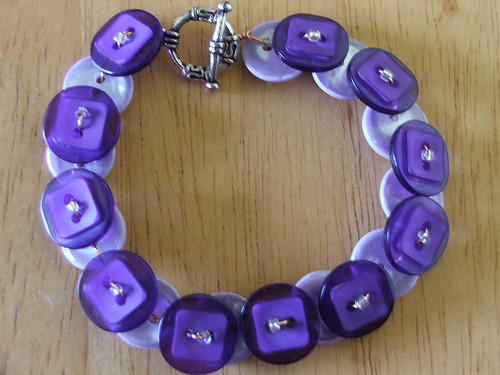 This time I used jewellery wire and a clasp. Spot the beginners errors! I don't particularly like the clasp but it's all I could find. And I have now learnt that the colour of the wire does matter - erk at putting silver and copper together! However I love the colours and I am pleased with the little seed beads which add a nice touch . (and once it's on no-one except me notices the colour clashes!
 A beach bag in lovely sunny colours (this is going in the post as a gift next week);
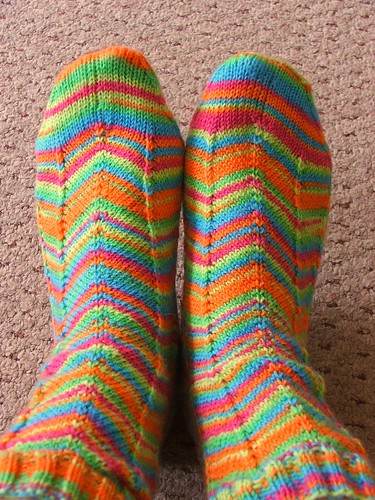 ... and a pair of VERY bright and cheerful socks - they will definitely help to see me through the dark winter months to come!
 1. Ok so the first thing to do is to remove the seams. Lay the fabric out flat in a single layer; don't worry about squaring up the edges.
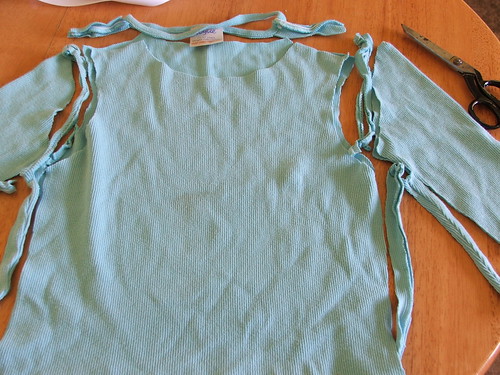 2. Using a guide, cut the material into strips. I made my guide from another t-shirt and wrote on it so I wouldn't lose it! My guide is 2 inches (5cm) wide, and being made of material it clings to the fabric nicely meaning I don't need to pin it on.
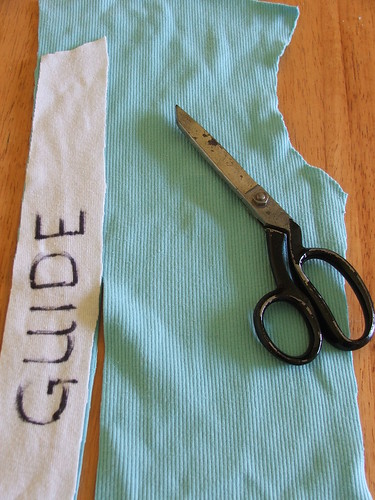 3. Voila - lots of strips of fabric! Carry on with the rest of your t-shirts until you have a nice satisfying pile to run your fingers through. I started off with a carrier bag full and though I cut them all up I still have quite a few left; however I got a good mix of colours that way.
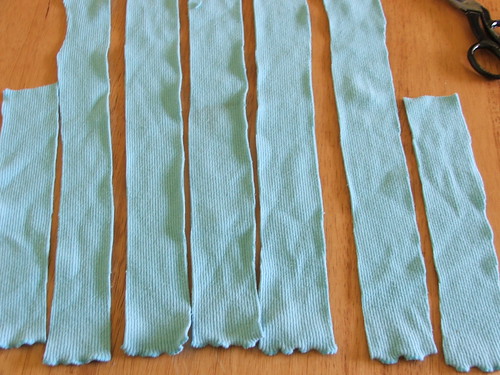 4. For your starting strips, cut a triangular shape out of each piece. Make sure each strip is a different length (I will explain why in a moment).
 5. Put a stitch through the end to hold them together.
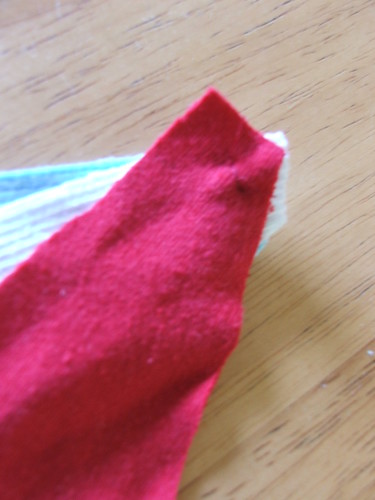 6. Using a weight to hold the ends down, begin to plait your strips. You might find it easier to get a willing slave to hold it for you. However I had no slaves when I took this photo so I nicked my daughter's paperweight. Make sure you plait your strips quite tightly together, but not so tightly that they start to buckle.
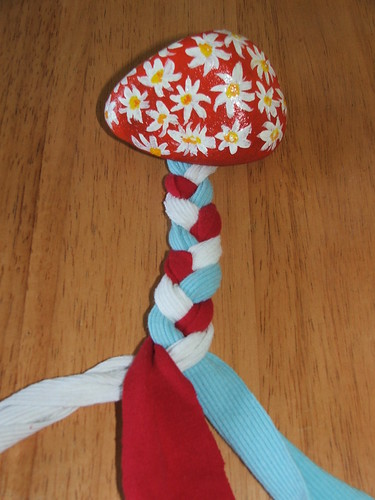 7. When you have plaited to the end of your first strip, pick up the next strip and plait it in. Wrap the new strip round the end of the old one, with about an inch overlap (a little more if you are nervous). This is where having different length strips comes in; that way, you don't have lots of joins in the same place!
 8. Continue adding in new strips as you run out, until you get bored/have none left/want to start sewing it together. You can add more strips later if you like, or you can make one long plait then do all the sewing in one go.
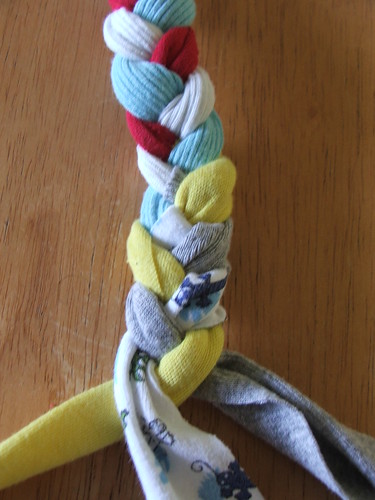 9. To begin the sewing, attach the thread to the back of the plait then, with the front uppermost, coil the end around itself with the ends tucked underneath.
 10. Flip the coil over and secure it with some small stitches.
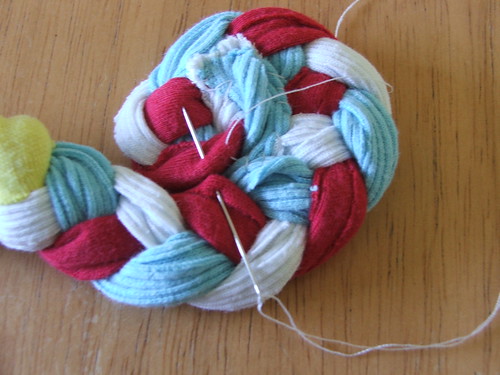 11. Continue to coil the plait around itself and sew together on the back. At this point it is easiest to continue with the rug back uppermost. It's vital to keep the rug flat whilst working so that it will lie flat when finished (if you make it on your knee then it will be full of lumps and bumps!), so it's best to do the sewing up on a table.
 12. Here's a close-up of the back of another piece so you can see the stitching. This is going to be a plaited bowl, so rather than working on a table, I'm coiling this one round a mixing bowl to make the shape.
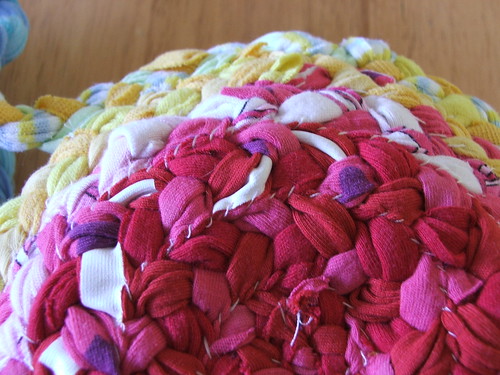 13. Here's the right side of the bowl (I'm experimenting with mixing similar shades here!
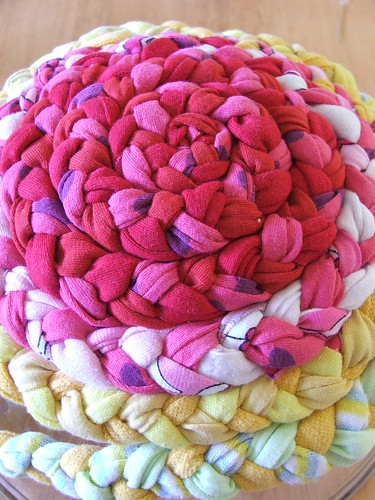 14. And there you have it. When you are satisfied that your rug is the right size for you, then add a backing fabric to cover up the stitching (can't show you a photo of that bit because I haven't done it yet!). Use a good quality hessian for the backing and it should help your rug last well.
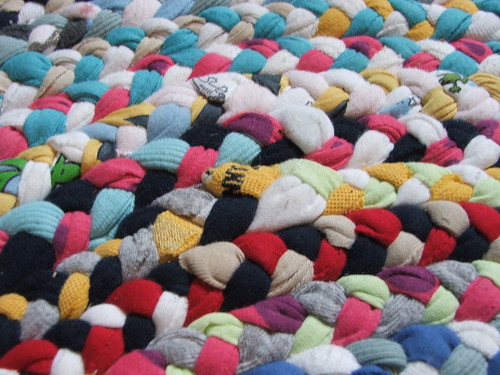 15. And finally ... admire your handiwork!!
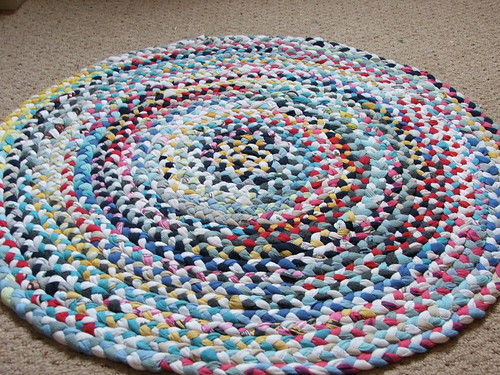 The girls have this rug in their bedroom now, and as well as adding a splash of colour they say it is very comfortable to sit on. I have put in lots of their favourite tops that they wore to death, woollen tights that had holes in, a couple of old breastfeeding tops of mine, and some old school t-shirts (those are the yellow bits in the close-up!), and the little one's outgrown pyjamas.
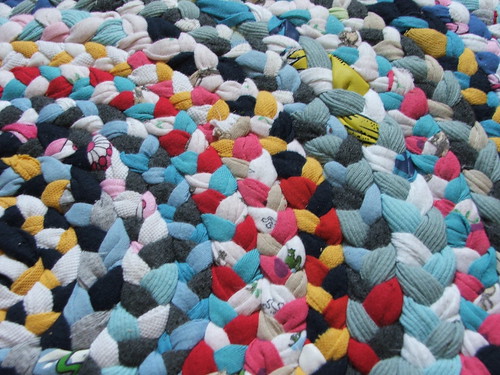 A real nostalgia trip and, best of all, very few bits for the bin!
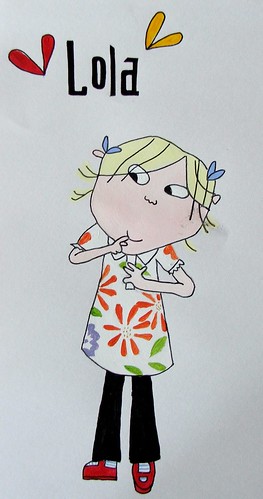 My eldest daughter loves Charlie and Lola (don't we all?) so I painted this in acrylics and outlined it in pen. (Unfortunately I rushed it a bit to get it finished before the littlest one woke up and smudged it ... gah)
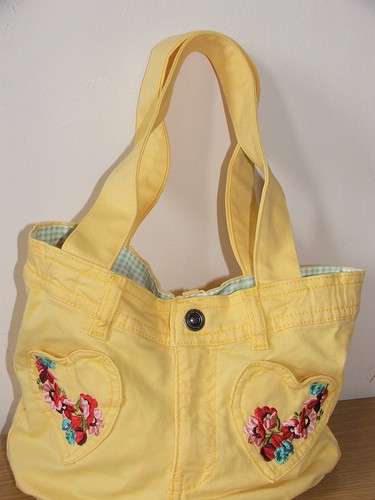 I went for a nice summery look, a departure from my previous "blue jeans" ones. I have improved on my design a little and now incorporate a magnet fastening and an inside pocket (it's not as wonky as it looks, honest!)
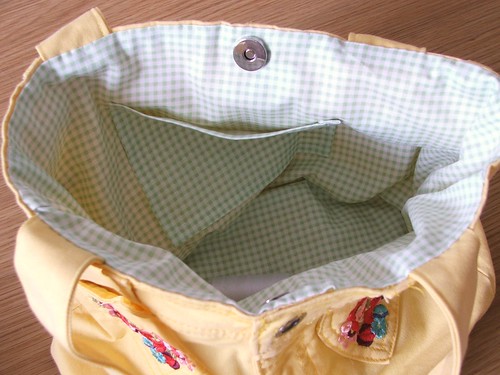
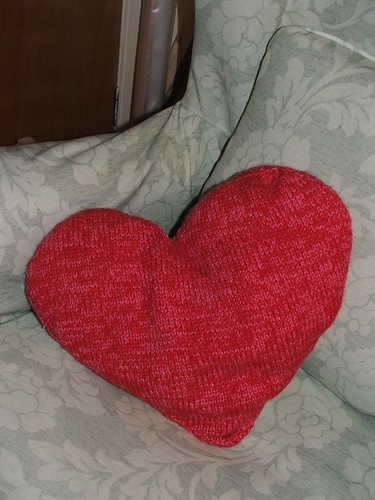 I love bright colours, but generally tend to steer away from anything too kitsch (WHAT??? I hear you say?) - no really, I do! However I couldn't resist making this heart-shaped cushion.
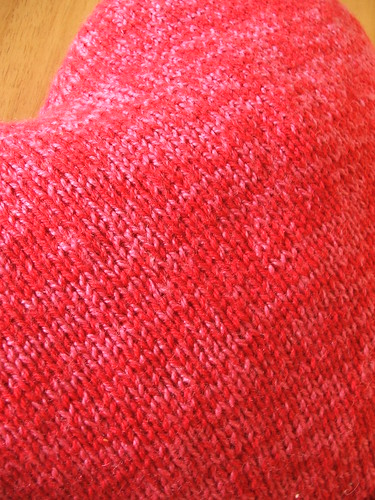
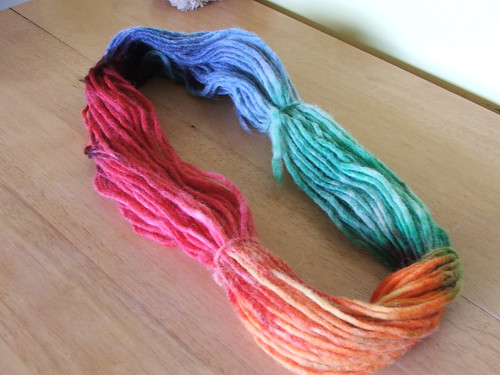 I used red, yellow, green and blue, painting it onto the yarn which I had previously soaked in vinegar, then I "cooked" it in the microwave.
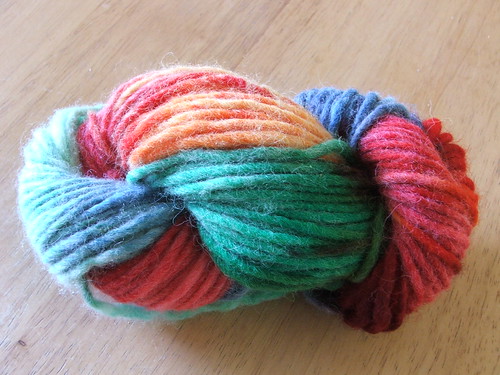 I was really pleased with the final result!
 However when I came to knit it up I found that where the colouring had "pooled" at the bottom of the bowl I had created a kind of dark brown, which appeared as blobs in the final result when knitted up:
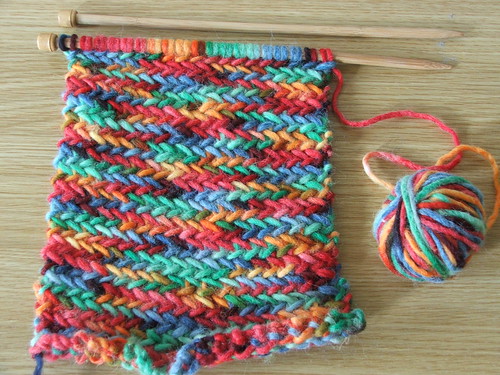 Ah well! Beginner's error I guess. It was great fun and I will definitely try again, though I might pick just one colour next time!!
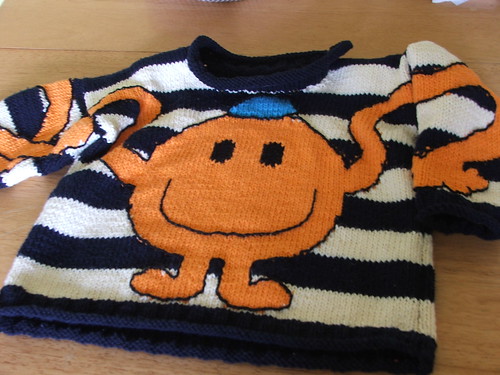 I love designing and creating intarsia but it's been a while since I did any now! However Calum had been asking for a Mr Tickle jumper for ages and I had an idea in my head, so I finally came up with this!
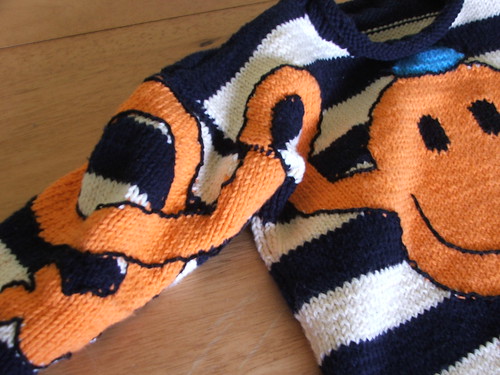 However this one was a little more succesful!
 Calum is thrilled with it, I had to sneak it away when he was sleeping to wash it!