Easter is almost upon us, and if like me you would always rather give a handmade gift than yet more chocolate, then I have a little tutorial for you to run up a very sweet present for a child near you! All you need is a baby sock, sewing thread and stuffing, and a spare half hour. In no time at all you will have a unique gift to bring a smile to someone's face!
So - first find yourself a baby sock. Let's face it, if you have small children, you probably have a bunch of these, all missing their mate. I have a theory that all lost socks find their way to heaven, and on your arrival there you get presented with a box full of them. But that's just my warped imagination.
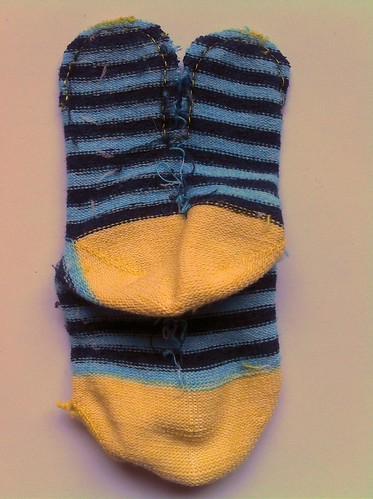
Turn your sock inside out. Using a biro or a felt tip, draw an outline of the ears at the top of the sock (the cuff end). Your ears should cover between a half and two-thirds of the top part of the sock. If you are using a white sock you might want to use a paler colour just in case it shows through, but it shouldn't matter too much. Leave a wee gap between the ears so that you can cut down it later.
Next, take some sewing thread and sew along the lines you just drew. I've used yellow thread so that you can see it easier, but it's better if you match it to the colour of your sock. Use a backstitch and make your stitches small and neat. If you prefer you could use a sewing machine to do this bit; handy if you decide to make a few of them at the same time.
Cut round your ears, leaving a small border round the edges. Make sure you cut almost up to, but not in to, the stitching across the bottom of the ears.
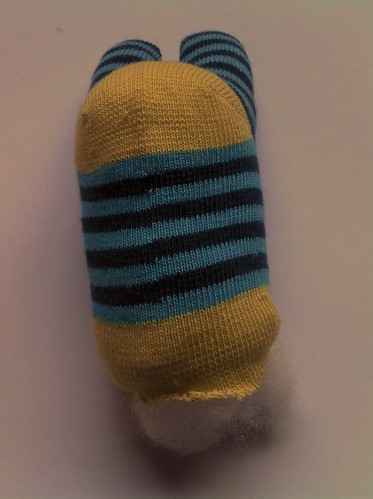
Next, cut a hole in the toe of the sock. It should be big enough for you to put the stuffing through.
Now turn your bunny the right way out and stuff it! Make sure the stuffing is evenly distributed across the ears, and resist the temptation to overstuff it. The softer and squishier they are, the more huggable they are. So my kids tell me anyway.
Sew up the bottom of your rabbit using matching thread. As you can see from my photo, I gently turned the raw edges in as I sewed for a neater finish.
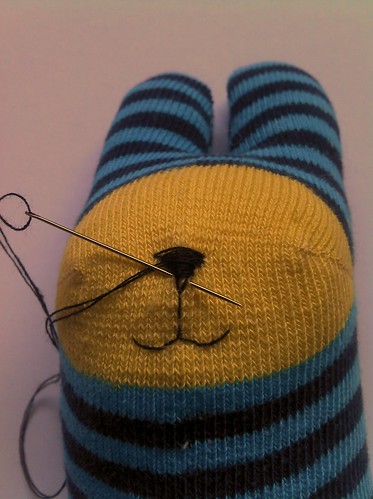
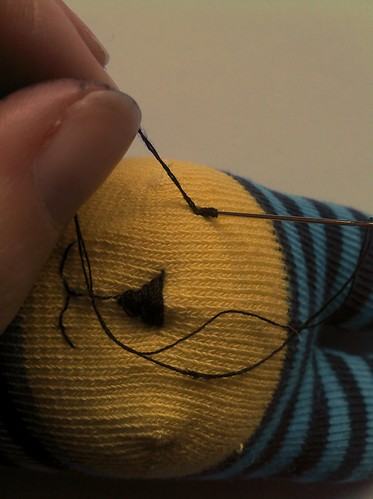
Now it's time to work on the face! I just wing this bit freehand, but if you are a bit nervous about that, you could draw on the features with washable marker pen first. You could use embroidery thread or ordinary sewing thread for this bit (I used sewing thread because it's a bit finer and I like delicate features, but it can be a bit fiddly when it comes to filling in the nose). Start by sewing an upside down triangle for the nose, making the top of the triangle level with the seams on the heel of the sock. Then sew the mouth with the stitches curving upwards at the ends (otherwise you will have a sad bunny).
Next fill in the nose. As you can see from my photo, I used my thread doubled at this point to make it a bit less fiddly, but you could use embroidery thread instead if you prefer.
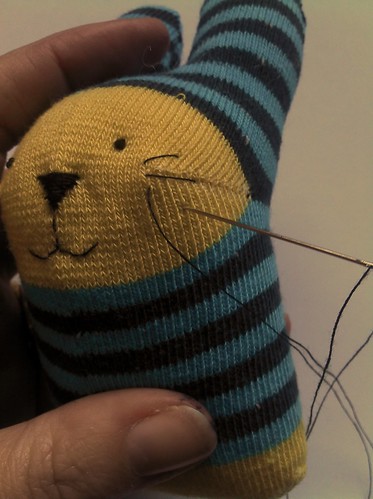
Now add some french knots for eyes. If you aren't giving it to a small child, you could use seed beads or little buttons for the eyes instead (see the end of the post for some rabbits with seed bead eyes).
Finally give your rabbit some whiskers. Bring your thread out at the start of the heel seam, and sew a long stitch along it. Add two more stitches either side of this one at an angle. Repeat for the other side.
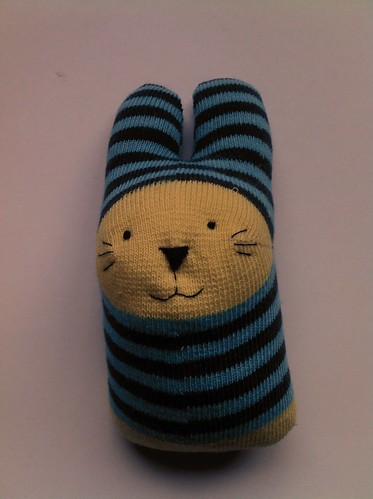
And there you have it! Your own little baby sock rabbit.
You could make them in lots of different colours:
You could even make a family of them! (I made these last year - check out the seed bead eyes). For the mummy rabbit I used one of those socks with a frill round the top.
So - go and have fun making your own wee rabbits! As always, feel free to make as many little rabbits as you like for your own use or for gifts, but please do not make them to sell. If you do make them and post your results, please link back to my tutorial - and come and let me know so I can see what you made! I've also set up a
flickr group for you to add your bunny pictures to, so we can share them all!
And finally - I did say there was a giveaway, didn't I! If you would like the little rabbit I made for the tutorial, please leave a comment on my post; if you link to my tute and giveaway on your own blog then come and post that too, it'll give you an extra entry into the giveaway! I will choose a winner at random next Monday and post the results on here.
Thank you for reading - I can't wait to see the rabbits you make!