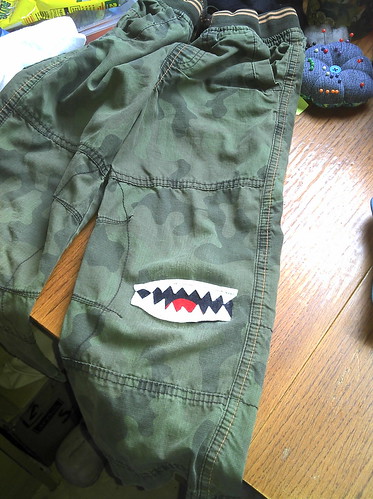
My youngest son Euan loves his combat trousers, but they had already taken a hammering by his big brother before they were passed on to him, so it wasn't long before the knee bit the dust. He really wanted to keep them though, so I promised to repair them for him. As a surprise, I turned a boring patch into a biting one!
First of all, I trimmed all the loose threads around the knee where the material had torn (actually I've just noticed that I hadn't actually done that when I took this picture! Let's just pretend I did then).

Next, I cut out the elements of the patch: a black oval shape for the mouth, two rows of sharp teeth, and a small semi-circle for the tongue.

I used felt for my shapes so that I didn't have any seams to deal with; hopefully it will stand up to a bit of wear and tear!
Next, I used dots of fabric glue to assemble all the parts of the patch before sewing it on to the trousers:
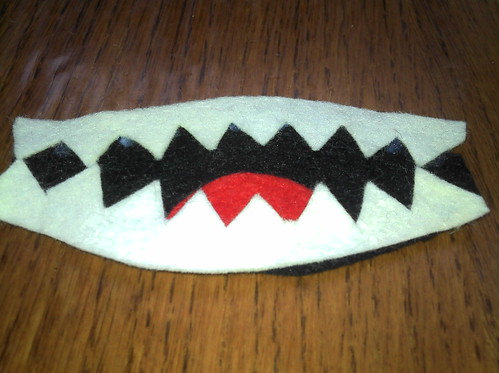
Then I attached the patch by machine using white thread. It's a bit of a faff doing it by machine, as I had to do each side separately, but I wanted to make sure it was really firmly attached. After machine sewing, I went round with a bit of black thread to make doubly sure the tongue and the sides of the mouth weren't going to work loose.
Result - one very happy boy!
In other exciting news - I finished my nearly-finished long-term project this afternoon! It's taken me over six months altogether and I am so delighted with it. I will post some pictures of it very soon.